Sunday 30 March 2014

Spring Miscellany

Lately I have been...

Squishing new balls of yarn, plump and full of promise.


Wondering whether this will be a scarf or a cowl and unsure, but very much liking the chunky rows of stitches.


Crafting crowns with glitter and glue for Dress Up As A Shakespearean Character day at school. (Bella wore her only "dress up" outfit, a Rapunzel dress. Don't judge me, I saw a boy in Angus's class in a Spiderman outfit.)


Marvelling at Angus's creations and his new found love of paint and paper, pens and glue. It's a dinosaur, obviously! Can't you tell?


Sitting in the chair, gazing out of the window and messing about watching One Direction videos on Mummy's phone. 


More sitting, and dog cuddling. Angus is dog obsessed lately and has been "walking" this dog all week.


Pottering, arranging and rearranging.


Shivering in a grey skied park and enjoying the lengthening afternoons through gritted teeth.


But rather liking the pink blossom against the grey sky, grudgingly.


Attempting a photo of the moon, following Kate's excellent tutorial, and wishing my camera had a better zoom lens.


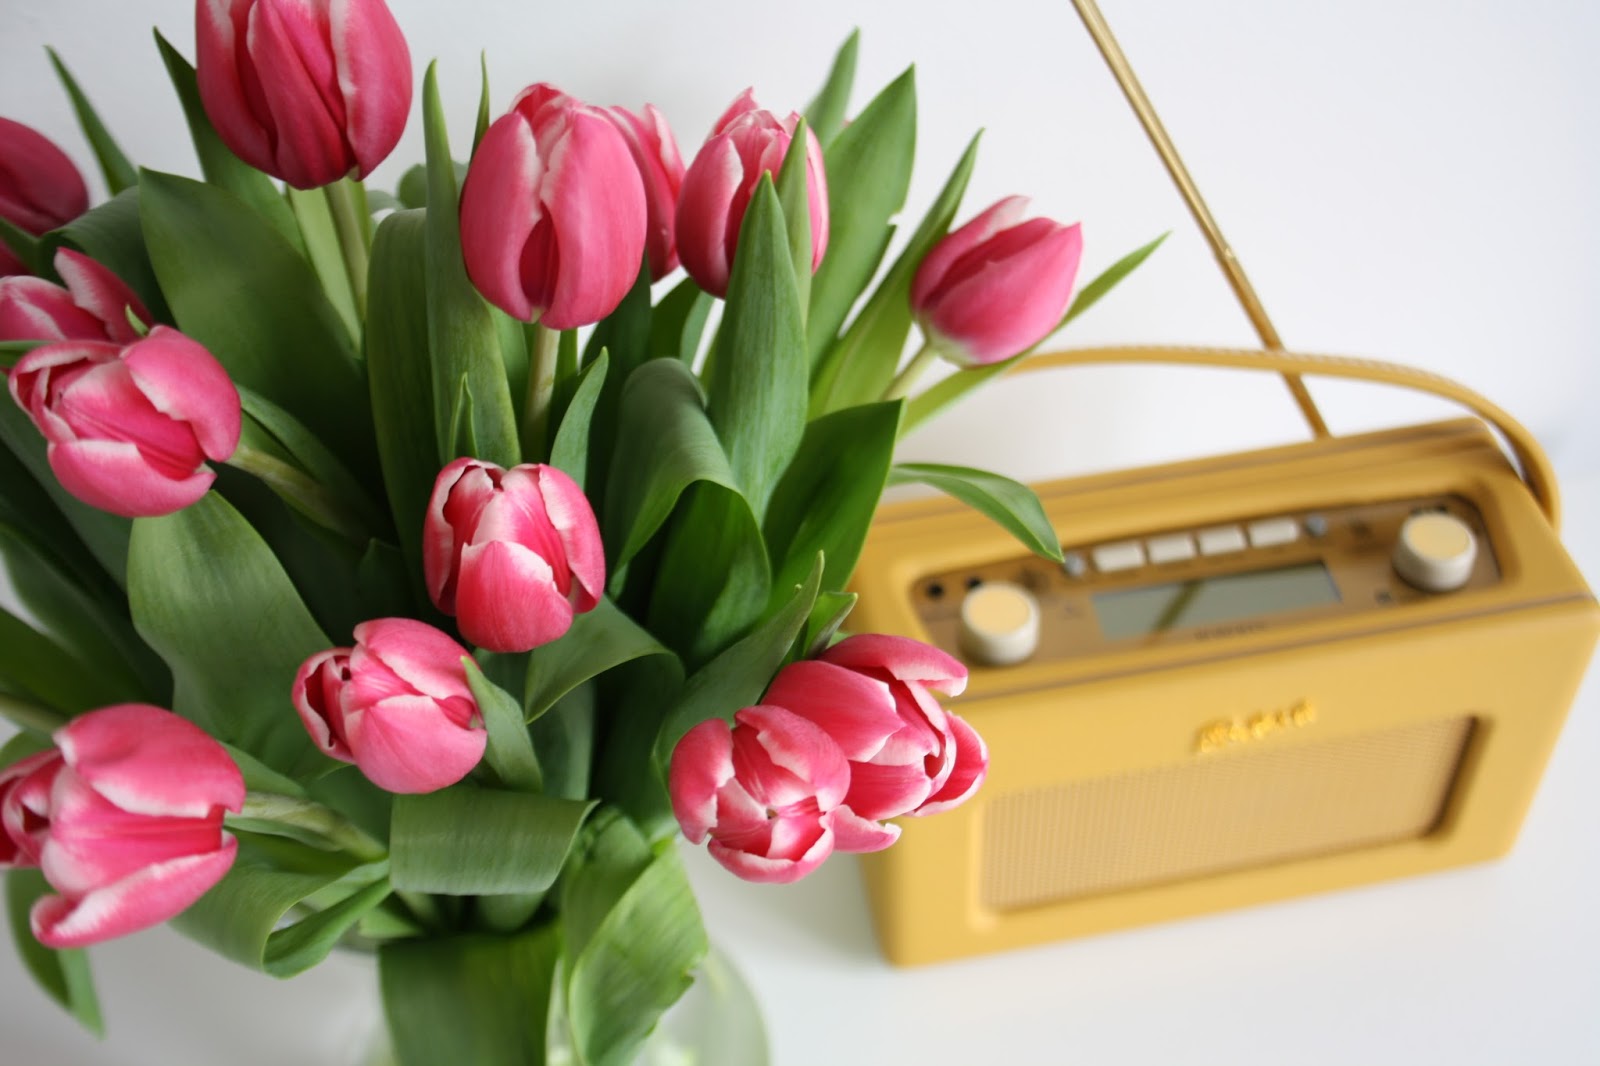
 Delighting in my Mother's Day pink tulips. A bunch of bright, perky white-tipped goodness.


Loving, just loving, my Mother's Day cards. I keep all the cards the kids make me in boxes under the bed. I call these my "sentimental boxes" and there are three or four now. Boxes, not cards. 


Savouring a low effort family lunch today. John went to the supermarket and bought a rotisserie chicken and some vegetables. We cooked an easy-going meal with Eton mess for pudding, then I spent the afternoon pottering in the garden.


Counting blanket squares. There are 108 in this photo but I recently had a spurt of productivity on this project and am currently on 122. I feel a crochet-update post coming on!


And last of all, we are LOVING, seriously, absolutely and completely obsessed with the US Netflix version of House of Cards. We've almost finished the first series - it's been two episodes a night for the last five days - and oh it is good. Very, very good. John and I regularly look at each other in awe, wonder, amusement and shock as each episode unravels into the next. I don't even sew, knit or crochet while watching it. It's that good. It's up there with The Wire, The Sopranos, The Killing and The Bridge for tv watching joy. It's compelling and well acted and I find myself thinking about it throughout the day. Just brilliant.

So, there we have it, some of the things I've been doing, seeing and enjoying, and trying to capture with my camera over the last week or two. I always feel these miscellaneous posts lack a theme or any direction, they feel a bit meandering. But I love looking back through my photos and sharing these things with you. Sometimes they are my favourite posts to put together, big on images and small on words. Unless I'm talking about House of Cards, then I have quite to lot to say it would appear! 

Thursday 27 March 2014

The Colour Collaborative: March - Bud


"Vague as fog and looked for like mail...snug as a bud and at home like a sprat in a pickle jug."
Extract taken from You're by Sylvia Plath.

I don't think any season is awaited with such eagerness, with such a sense of expectancy and anticipation, than spring. 

Summer arrives, sometimes early, sometimes late, (or sometimes not at all, this is the UK) and it morphs in autumn, and then before we know it winter is upon us. But I don't declare "It's autumn!" or "Winter is finally here!" with quite same delight as I do spring. That first warm weekend in March which has me out in the garden, inspecting borders and planting seeds; the satisfaction in seeing the bulbs planted in autumn poking their green shoots upwards; the gentle, tentative warmth of the sun; the joy of snipping the first tulips to bring indoors and put in a jug; £1 bunches of daffodils in the supermarkets; the ever-lightening afternoons and evenings...there is much to celebrate and be thankful for at this time of year.

When we agreed that "bud" would be our prompt for this month's Colour Collaborative post, the first thing to pop into my head was the poem You're by Sylvia Plath. For those that don't know it, it's about pregnancy and Plath's feelings towards her unborn child. It's one of my absolute favourite poems, capturing the wonder and mystery of waiting for a new arrival, those feelings of at once knowing but not knowing the baby growing inside you. Of course there are many parallels between spring, pregnancy and birth; Easter, new life, eggs, buds, lambs, growth. Those feelings of waiting and anticipation that spring provokes remind me of expecting my own babies. Waiting, waiting (mine were both two weeks overdue, we did a lot of waiting), looking for signs. Now? Today? No, not today. Not knowing exactly when they would come but knowing that they would, at some point. Planning, preparing, readying ourselves. It's like the slow approach of spring. A glance out of the window shows sun and blue sky, surely spring is here now. But I open the front door and then go back for my coat, hat and scarf. The wind is cold. No, not today, it's still winter. But it will be spring at some point, we know it will.


Two years ago I planted a camellia in our back garden. It produced nothing during it's first year. And, to my huge disappointment, it produced nothing last year either. This year, I was hopeful. I was expectant. And, so far, I have counted ten fat, pink buds. Ten! When I happened to glance out of the window last week and see that the first had unfurled and opened, I gasped (even though I was on my own, what a weirdo) and then straightaway took a photo on my phone to send to my mum, who planted it with me.


The buds are pale and creamy to begin with and it's hard to guess what their true shade will be. The blooms look different depending on the light and time of day; sometimes pastel and rosy, other times deep-hued and glowing. They carry a graduating ombre of pinks from the bold, raspberry centres to the blanched, delicate, fading edges of the petals. The flowers pop out against the dark green leaves and grey dry-stone wall, providing a welcome burst of colour in an otherwise drab garden, and a reminder that spring always comes. Eventually.


What is The Colour Collaborative? 


All creative bloggers make stuff, gather stuff, shape stuff, and share stuff. Mostly they work on their own, but what happens when a group of them work together? Is a creative collaboration greater than the sum of its parts? We think so and we hope you will too. We'll each be offering our own monthly take on a colour related theme, and hoping that in combination our ideas will encourage us, and perhaps you, to think about colour in new ways.

If you'd like to read posts by the other Colour Collaborative bloggers, please follow the links below:

Annie at Knitsofacto
Sandra at Cherry Heart
Jennifer at Thistlebear
Claire at Above The River

And this month we are also joined by the lovely Sarah at Mitenska. Please do pop over and read, say hello if you like!


Tuesday 25 March 2014

Winter Stitches


Back in October last year, I showed you an autumnal themed embroidery I'd sewn, called Autumn Stitches.  Your comments were just lovely and a few of you suggested I do one for each season. That thought lodged itself in my head and refused to budge, and the more I thought about it the more I wanted to make three more of these seasonal scenes.

So here is my winter version. I know, it's spring now. I'm late. It took a while. Truth be told, I didn't enjoy this very much until it was almost finished, and then I didn't want it to end. The pale palate of colours I'd chosen felt bare and I was worried it would look too naive, too simplistic. And it was actually quite challenging thinking of natural wintry motifs and imagery that were not Christmasy. Holly, snow, snowflakes and robins were ruled out for this reason. Fir trees and reindeer felt too Scandinavian. I wanted the quiet, icy cold of a February morning; pale, pastel skies, bare branches, a covering of frost over branches and ground, and the glimmer of spring coming with greenery showing here and there. You'll be pleased to know I like it now.


Elements of the design - the tree, ladybird and toadstools - are from an old edition of Mollie Makes, issue twenty two. Everything else - the sky, snowdrops, footprints and seed heads - are mine. I draw the images onto the linen freehand with a fading pen, and then stitch over the top. Mostly this works. Sometimes it doesn't. 

The seed heads are my favourite part. What I love most about this embroidery is the way it feels when you run your fingers over it - the little prickles of the french knots, the smooth bumps of the satin stitch, the braille-like quality of the sunset - it wants to be touched.


It's framed in it's hoop, easy and simple. I trimmed the fabric to a little larger than the hoop, added a (messy) running stitch, and pulled it tight.


So here it is, my winter scene. 


I like it on it's own, but I like it much more displayed alongside the autumn scene. And I think these hoops will work better together, rather than as individual images.


I am already excited to start the spring embroidery. The tree will be full of buds and blossom, the ground covered in tulips, daffodils and grape hyacinths. I might even attempt a rabbit. And for summer...the tree will be bursting with layers of greenery and there will be butterflies, but that's as far as I've got. I'd love to hear any ideas for spring and summer motifs that you might have.


***********************************

Thank you for your congratulations and well wishes for my sister, Katy - so kind of you. 


Sunday 23 March 2014

Happy Day


Yesterday was a happy day; my sister, Katy, got married to a very lovely man. It is the second marriage for bride and groom and, I don't know, maybe that just made everyone very relaxed. No big white dresses, no anxious in-laws. They organised everything themselves. The reception was in the same room they got married in, at their church. Chairs were quickly cleared to make room for round tables decorated with balloons and spring flowers. Each table was laden with big bowls of Thai vegetable curry, chicken curry, lamb tagine, rice, couscous, naan breads, and we all helped ourselves. Chocolate brownie sundaes for desert. A children's entertainer kept the small ones occupied in a next door room during the speeches; everything was easy and child friendly.

Bella and Angus, plus their cousins, made a merry little gang of four bridesmaids and two pageboys. The girls all carried floral wands and the boys had little rosebud button holes. Angus looked adorable (small boy in a suit and tie, just too cute) and was pristine for about thirty minutes. He snapped the rose bud off his buttonhole half way through the service. By the time the photographer was ready, he also had peanut satay sauce (from John's canape) over his sleeve and grass stains all over his trousers. Shortly after that he spilled chocolate sauce all down his white shirt. Bella fared slightly better, her "ballerina" bun mostly intact. I nearly burst with pride for them both, my babies.

I cried a little when the bride and groom danced their first dance. Maybe's it's because she's my sister, maybe it was the warm, accepting atmosphere, maybe the music, but there was a lot of love in the room yesterday.

And when the happy couple left (for St Lucia, lucky things) Happy, by Pharrell Williams was playing. 

I can't think of a more perfect song.


Friday 21 March 2014

How to Make a Peg Bag


Hello! Well it would appear that, technically, Spring is here. It's still rather chilly but I feel like we're on the cusp of that glorious season, rather than in the midst of it. Even if it's not warm enough to sit outside, one of my biggest pleasures when the weather warms up is being able to hang washing on the line again. Nothing smells better than air-dried laundry. A while back I made a peg bag, and I've been saving this tutorial until a time when people might actually want to peg out their washing without freezing their fingers off. 

I hope you all have a lovely weekend. We are off down south to attend my sister's wedding. Suits and dresses are reading and waiting. Happy days!

**************************************************

A Peg Bag Tutorial

Last year, my mother-in-law asked for a new peg bag for Christmas. My first thought was that it was a very utilitarian sort of thing to make and give someone, that there was nothing very special or gifty about it. But I duly set about it; I emptied my own peg bag of pegs and turned it inside out to see how it was made. I bought some fabric, a heavy-duty printed cotton from Ikea; I knew that my mother-in-law would like this Swedish-style country pattern very much, and the fabric needed to be sturdy enough to take lots of everyday use. But, do you know, the more I got into this project, the more I enjoyed it. It occurred to me that why not make everyday household items as pretty and lovely as possible, and ask for or give them as gifts? Why not take care to make them as nice as they can be? Successful companies like Cath Kidston have built their brands on this idea.

A year ago there is no way I would have attempted this. But last summer I went on a sewing course and learnt how to use my machine properly (ish), to sew carefully and accurately, and to understand why certain things need to be done a certain way. And so, I humbly share with you my tutorial for making this peg bag, should you want to make your own. Don't worry, you wont see me on The Great British Sewing Bee any time soon, I am very much a beginner. It's very easy, I promise.

I opted to use two types of fabric for my peg bag but there is no reason why you shouldn't use one - or three - depending on what you fancy and what you have in your fabric stash.

Materials you will need:

  • Brown paper or lining paper for the template.
  • A child's wooden coat hanger.
  • Fabric of your choice - two fat quarters or the equivalent amount will easily be enough.
  • Some ribbon or lace trim - enough to go across the width of your bag, 50 cm should do it.
  • Plus good, sharp scissors (not the sticky ones from the kitchen drawers), threads to match your fabrics, a fading ink pen and a sewing machine.


Begin by making your template. Put the coat hanger onto the paper and draw around the shape (not the hook, just the "shoulders"). This will determine your width. Then make it as long as you want - I was aiming for a vaguely squarish shape that flared out at the bottom. Cut out 2cm all the way around your template - this will be your seam allowance. You can see here that I folded my template down the middle before cutting so that I knew it was exactly symmetrical. Draw a horizontal line approximately one third of the way down the template, which will determine where the opening for the pegs will be.


Now cut out the back of your peg bag by pinning your template to the fabric and cutting carefully around the edge.


Now you want to get ready to cut both front panels. Remember that line you drew before (arrow 1)? Well you need to draw one more line 2 cm above it (as in arrow 2) and another line 2 cm below it (arrow 3). This creates your seam allowance either side.


Now for the bottom front panel. Take your template and fold it along the top line (arrow 2). Pin it securely to the fabric and cut around the edge.


Then re-fold along the bottom line (arrow 3) (tucking in any paper that will interfere with the shape of your template), pin and cut out. This gives you the top front panel.


And now you should have three panels - one for the back and two for the front.


Take your two front panels and line them up right sides together, pinning along the long, straight side.


Using a fading ink pen, draw a line 2 cm down and about one quarter of the way in on either side, as below. This is the part you are going to sew shut, leaving the central pocket open. You could mark this spot with pins if you prefer but I find the pen easier.


Sew along the line on each side, then press your seams open. The front should look like this now.


Now flip it over and turn each hem under twice, pressing it well, and pin into place. Sew both hems then press again.


If you're using any lace or trim, pin it in place underneath the opening as below, and carefully sew it into place.


Now you are ready to sew your front and back pieces together. Place the pieces right sides together and pin all around the edge.


There is one section you don't want to stitch shut and that is the very top part where the coat hanger hook will go. Place two pins in here facing vertically downwards, to remind yourself to stop sewing at this point.


Starting on one side of the top opening, stitch all the way around the edge leaving a 2 cm seam allowance, until you reach your vertical pin on the other side. Snip your corners on the diagonal, turn it the right way out and press well. Insert your coat hanger (this will take a bit of gentle wriggling but it will go in) and ta da, your peg bag is complete.


I made a tea towel to match with the scraps of leftover fabric, with lines of washing flapping in the breeze, for a bit of fun.