Sunday, 3 June 2018

Late Spring


Every time we go to the beach, Ziggy ventures just that little bit further into the sea. Today, he went in up to his armpits. Some of the things he loves the most - Bella and Angus, other dogs - all go in the sea but he is very wary. I can't see him doggy paddling any time soon.


I think its still late spring, but the weather feels like summer, and I bought my first bunch of peonies this week, always a sign that summer is on it's way. It's been gorgeous here this weekend, just the right amount of warm and sunny without everyone feeling like they're wilting. In fact, as I sit here at the end of a week off with such a sense of contentment, I think that it's been a pretty successful half term. Our friends from Yorkshire, old and dear friends, came to stay this weekend and it was such fun. We ate and drank a lot, chatted, stayed up late planning holidays, went out for lunch, to the woods, to the beach. The weather has been mixed but good when it needed to be - the bank holiday and this weekend - and the rain midweek meant that I haven't had to water the garden much. We've completely worn out Ziggy and he's now slumped on the rug in the living room, out for the count.

We've eaten well; barbecues, ice cream-cookie sandwiches, pavlova, plus a few lunches out for half term treats. There was also Nigella's chocolate coca-cola cake to celebrate John's birthday. I went a bit overboard with the icing but I don't think anyone minded. 


There are nineteen candles on the cake because that's all I had left. Add another twenty one and you'll have his age. His gift was a shiny new coffee machine which he's having fun getting to grips with. I'm having fun drinking all the coffees he keeps making.


We have spent every moment we could in the garden and it honestly has been like having another room. Fed up with our hard wooden garden bench which is crippling to sit on for more than ten minutes, we bought a new one. John happened to see it was on offer and before you knew it we were discussing which colour we should get. 


It's the most comfortable bench I've ever sat on, like a sofa, and everyone wants to sit on it all the time. 


John sanded and painted the railings that encircle the balcony at the front of our house. They're a lovely period feature of our 1960s home but not the most fun DIY job to do, and one we'd been putting off since we moved in over three years ago. The whole job was hot, dirty, fiddly and awkward, and John worked really hard on them. Everyone else around us has painted theirs black so of course we went for mint green. They are glorious now, and the colour goes with the grey roof tiles and hot pint flowers I planted in the hanging basket by the front door. Every time I drive down the street towards the house and see them it makes me happy.


Meanwhile, I was sanding and painting something else indoors: one of our chairs, which Ziggy had chewed really badly. (Incidentally his chewing is much better now, although don't ever leave a pair of sunglasses lying around, and he hasn't really destroyed anything for a while. He's moved on to digging. So that's good.) Anyway, the ends of the chair arms were so badly chewed that we just sawed them off, then sanded the rest of the chair. 


I then painted it white (three coats of water based undercoat, two of water based eggshell) and I feel like we have a new piece of furniture! It's not an expensive piece of furniture but one we like, and I see no reason to get rid of it when it can be salvaged. 


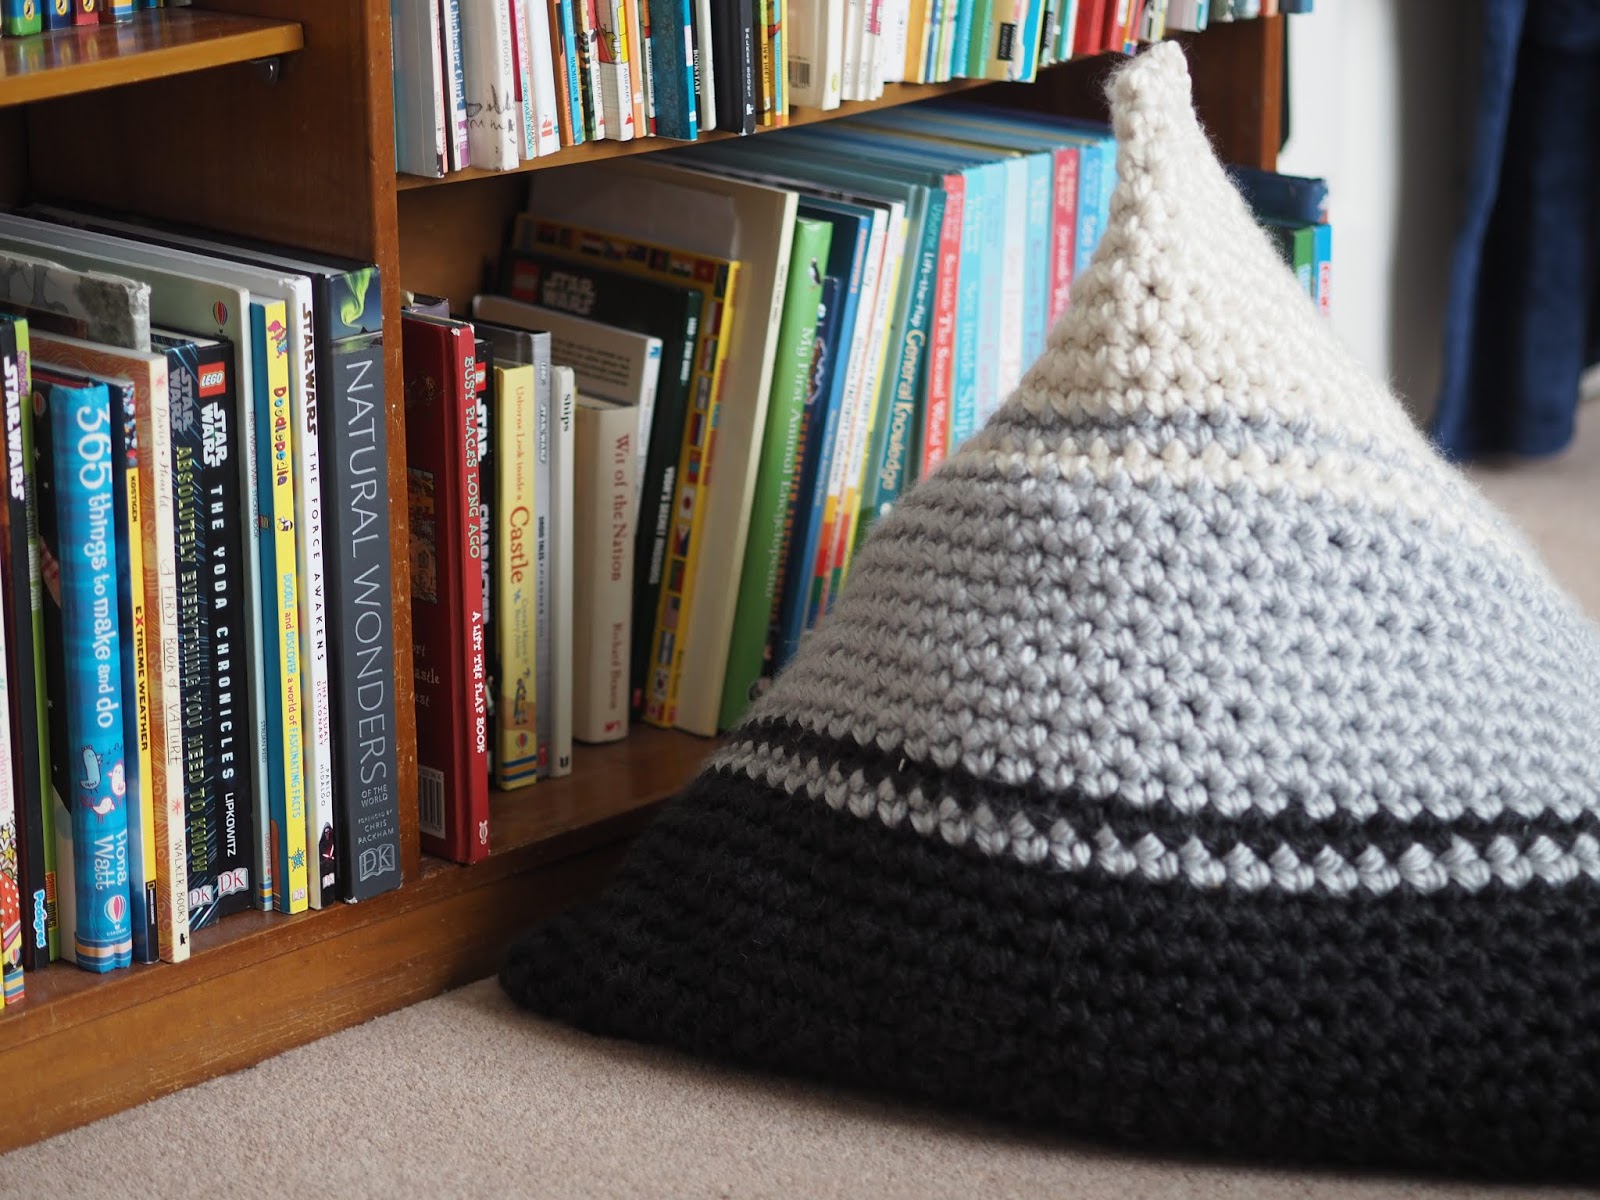
As well as all this DIY and gardening, there was lots of craft time this week too and I got a few projects finished, including this large floor cushion for Angus's room.


It's based on a pattern I saw in Supersize Crochet but I just couldn't follow the pattern exactly because it called for ten balls of t-shirt yarn and at around £9 a ball that's one expensive floor cushion. So instead I found some super chunky acrylic yarn and played around with hook sizes until I was happy. Actually, the design is really fun - you crochet a kind of square cushion shape and then, when you're ready to sew it up, you lie it flat, then pick up the centre of the front of the top row and match it to the centre of the back row and then make that your seam, creating a pyramid shape. It's hard to describe but really effective. I made an insert with cotton to hold all the beanbag filling - my, that stuff is hard to work with, it wants to go everywhere, and any you drop on the floor pools together like mercury -  and I'm happy with it, Angus loves it, and so we're calling it a success. 

This stitch sampler from the Spring Craftpod is another addition to the hoop wall. I enjoyed the reduced colour palate of just a few shades of green, and the simplicity of the design. I also enjoyed sitting in the garden quietly working on it here and there.


So yes, a good week. It's back to school and work tomorrow for seven more weeks. Deep breath, dig deep - it's going to be busy. But I am hoping for lots more good weather and time in the garden between now and then.

Wednesday, 30 May 2018

Making the Seasons: May


Welcome to May's Making the Seasons post, a monthly project between myself and my friend Lucy. I know that, throughout this series, I have been championing the delights of the small and seasonal project, something achievable and easy to do around the demands of everyday life, but not this month. This time, I found myself with a new book and a half term break coming up, and so I deliberately set aside some hours to myself to experiment with dyeing with indigo. I know that there is nothing particularly spring-like about dyeing fabric, but it is something best done outside and so the beautifully sunny and warm weather we had over the bank holiday weekend was perfect. 

I have never dyed anything before. The tie-dye craze passed me by, and while I've seen lots of crafters dye with natural materials, or dye their own yarn, it never really appealed quite enough for me to want to learn a whole new skill. But then, on a whim really, I bought this book, and I think I am hooked. I'd really recommend it as an introduction to Shibori dyeing as the stages are set out very clearly, and the sewing projects inside are an inspiring way to see how Shibori patterns could be used on various garments or household items.

I didn't use the sewing projects though in the book though. Having already bought the book and then spent £25 on an indigo dye kit, and wanting to keep things as simple as possible, I decided to dye things I already had in the house rather than buying metres of cotton and linen, tempting though that was. I rummaged around for some unused plain white tea towels I knew I had somewhere and an old cream pashmina/scarf. I also bought a plain white linen table runner and some new cotton pillowcases and took it from there. (Indigo does not adhere to synthetic fibres so I had to make sure everything I used was a natural material.)


Making up the indigo dye is like following a recipe really; various things have to be weighed, combined and mixed to a paste, then something else is weighed and added before it's left somewhere warm for a little while. Then you get your water ready and add the dye concentrate to the water, then leave it again. I am not going to do a step by step tutorial here as I don't feel nearly expert enough, but there are loads online if you want to find out more. 


Earlier that day, I had prepared my fabric. First I tried Shibori Kanoko, which is very similar to the Western tie-dye style. Sections of cloth are bound with string (or elastic bands - so easy to snip off afterwards!) in different ways. You can create a lovely sunburst pattern by folding the fabric into a square and then tying sections from a central point going outwards towards the edge, as I did for the scarf above. Or wavy stripes can be made if you concertina the fabric and place the bands or string at regular intervals along the length as I did in the tea towel at the top of the picture below.


Next was Shibori Itajime, which uses wood to create pattern, like these pegs in the tea towel above. The two pillowcases, below, I folded into triangles then sandwiched between two pieces of wood, tying the elastic bands as tight as I could. 


Finally I tried Shibori Kumo, which I think is my favourite. Found objects, most often pebbles, are placed and secured creating lots of rings of different shapes and sizes, and this is what I used for my table runner. 


The folded fabric needs to soak in water for a couple of hours before you can dye it. 


The actual dyeing process happened much more quickly than I thought it would. It seemed to take less than a minute for the colour the take and deepen really quickly. I am curious to see what would happen if I left fabric for much longer, or even just for ten seconds, but for all that I dyed, it was no more than thirty seconds to a minute. While the fabric is in there, try to wiggle it around a bit to get as much dye into every section as possible, but don't splash it around as indigo does not like too much oxygen in the water apparently. No idea why, but it said so in the book and everything else I read online. 


As soon as you remove the fabric from the dye vat, have a bucket of water ready. I removed my bindings at this stage, although you can also do it later if you like, but I just thought it would be easier to rinse. I had a few buckets and the hose lined up next to me in the garden to I could rinse and change the water quickly. When most of the colour seems to have gone, you do a final rinse with fresh water and some vinegar, then hang it on the line to dry. 


After they'd dripped on the line a bit, I put them in the washing machine on a normal wash with some detergent, and dried them. This instantly faded the colour a little from the deep purplish blue to a softer, more denim blue which I much prefer. 


Shall we look at the results? Oh, go on then. So the Itajime technique, where the fabric is folded between wood, created the most beautiful triangular pattern with a small amount of blue over a large white area. I really like this, it's ideal for these pillowcases as it's not too much.


The pegs create small, uniform white rectangles on a predominantly blue background as you see in the tea towel on the left.


While the one of the right has the wiggly stripes from the concertinaing and tying of the Kanoke technique.


With my scarf, I folded it in half before then folding into two squares which created a beautiful double sunburst pattern which is stunning.


 This scarf was sat in the attic until last weekend, not worn for two or three years, and since dyeing it I've worn it every cloudy day this week. I feel like I have a whole new item of clothing!


And finally the table runner with the Kumo, or pebble, technique. Those irregular circles create a beautiful effect and it looks lovely on our outdoor table. (John made it a few weeks ago - I still haven't had time to put together a proper garden post but I will soon, I promise.)


There end my adventures with indigo dye. I absolutely loved it, and really want to do it again. I am very tempted to try a white duvet cover, and a t-shirt, and maybe some fabric so I can make things like cushion covers. John is threatening to stage an intervention if it all gets too out of hand. But the moment when you take the item out of the vat, undo the ties and see that it worked is so exhilarating, I can see how it would become addictive. I was giddy with excitement and dragged everyone out to the garden to see what I'd made. 

I hope you've enjoyed reading about my dyeing fun. Please pop over to Lucy's blog, Attic24, to see what seasonal and creative wonders she has been creating in this beautiful month in her post.


Friday, 25 May 2018

A Peg Rail Shelf


Hello! Everyone ok? It's Friday and half term next week so I'm smiling. I'm also high on DIY because I'm so excited to share with you a little project we've had going on here over the last month of so: the creation of a peg rail and shelf in our porch. 

The porch (or you might call it a lobby or mudroom) is a small enclosed area between the front door and inner door into the our hall. It serves no purpose whatsoever other that it holds a shoe rack and some of our shoes, but the main bulk of shoes, boots, coats and scarves etc are stored in a big built in cupboard at the end of our hall, so you still have to walk through the porch to hang up your coat anyway. I would happily remove that glass wall and door tomorrow which would instantly make the whole hall bigger and brighter but that's an ongoing discussion for John and I to have.... ;-) 


But the porch is the first thing you see upon opening the front door so I like it to look nice. You can see more photos here.

Anyway, before I warm to my theme too much and get out a sledgehammer, it all started after the millionth wet dog walk we endured over the endlessly rainy Easter holidays back in early April. It must have rained every day over those two weeks and I got sick of trying to find somewhere to hang our dripping wet coats so that they could dry off. I couldn't put them in the hall cupboard, because they'd make everything else damp. I needed some hooks!


Opposite the shoe rack in the porch, we have a funny glass wall, a window that looks into the garage. The idea is that it lets borrowed light into the garage but it also provides a hideous view of, well, the garage, and no-one wants to see that so I covered it up with window film three years ago when we moved in. The window film was always peeling off and looked terrible so we decided to cover over this glass wall and create somewhere to hang wet coats.

My brilliant Dad took me to the local timer merchant - that was an education, you have to take your own saw! - and we bought some wooden tongue and groove panels and then he kindly spent one Saturday building a frame then fitting the panels on top to cover up the window.


I swear, I could hear angels singing when I saw that panelling. The difference! No more peeling window film looking onto cobwebs, just a smooth wall of beautiful wood. I set about filling in the nail holes and undercoating and painting the tongue and groove panels with water-based eggshell suitable for wood. 


Knowing we wanted to hang a shelf on this wall, my Dad positioned one of the horizontal batons behind the panelling at a pre-agreed height so that we could screw the shelf into that, to give it extra strength and security. (I told you he's brilliant, thanks Dad.)

Then I just needed my hooks. After hunting high and low for a simple and affordable set of peg hooks with a little shelf on top, I gave up and asked John to make me one. We bought wood and a circular baton, and a drill bit with the same diameter as the baton, and John made me a beautiful shelf. Ever the perfectionist, he is annoyed that the top of the shelf bows a little. (I didn't want brackets. Maybe I should have had brackets?) But I put a trailing plant on it and said I don't care, no-one will notice. I've deliberately left it unstained and unpainted for now, although I might change that later. 


But I could not be happier with our affordable homemade solution to the dripping coat problem and of course since we made the hooks the weather has been absolutely glorious, and I haven't needed a coat, never mind a rain coat. But don't worry because I've got a few, just one or two you understand, crochet bags to hang on those pretty peg hooks, what a relief....


Shall we look at a before and after? Oh go on then, if you insist.

I hope you like it. Of course, since we boarded up the window to the garage it's dark in there and you need to switch the light on when you go in, but that's really not remotely inconvenient and a small price to pay for a beautiful panelled wall. Discussions about how and when we will remove that internal door are ongoing. I will keep you posted.